...
| Info |
|---|
CXD Connector is a read-only tool; it neither modifies your 3CX configuration nor directly accesses any 3CX internal databases |
Pre-installation requirements
You need to have the information below and at least 2.5 MB of disk space in order to complete the installation of CXD:
- IP address of the 3CX phone system
- Primary/route account username (SSH access)
- Password for Primary account
Once, you have this, our support team will be able to remotely configure CXD and set up event logging for you.
NOTE: CXD does not alter the configuration of the phone system itself; it only uses the information to establish the connection to collect live events.
Getting CXD
Please Installing CXD on your 3CX
Using SSH, connect to your 3CX using a privileged user account, then enter the following commands:
| Code Block | ||||
|---|---|---|---|---|
| ||||
 cd /var/tmp
 wget https://esd.tri-line.com/open/cxd/cxd_latest_amd64.deb
 apt install -f ./cxd_latest_amd64.deb
|
This will start the text-based installer which consists of a series of prompts to enter the settings described below. Press ENTER at any prompt to accept the default value shown in square brackets.
If you enter an invalid value (e.g. a port you've chosen is already in use) you will be prompted again until a valid value has been entered. To abort the installation, press CTRL+C.
| Prompt | Description |
|---|---|
| HTTP port [5080] | The default HTTP port to use for web requests. |
| HTTPS port [5443] | The default HTTPS port to use for web requests. |
| TCP port [7000] | The port used by CXD to emit live event data over a TCP connection. This is the port used when setting up the connection in TIM Enterprise. |
| Authentication Key [xxxxxxxxxxxxxxxx] | Choose a secret that you will also use when setting up the connection in TIM Enterprise. Press ENTER without typing a secret if you want to accept the random secret the installer has generated for you. |
| Register product [YES] | You can choose to register the installation with your Tri-Line account. If you select YES, you'll be asked for your Tri-Line Gateway login details: username (email) and password. If you skip this step, you can assign the installation to a customer account later in the Tri-Line Gateway using your web browser. |
After completing the steps above, the installer automatically enrols with the licensing service and starts CXD automatically.
To connect TIM Enterprise to your newly-installed CXD service, see Configure TIM Plus below.
To get a copy of the Windows version of the CXD Connector, submit a support ticket through our online Gateway or send an email to to [email protected] to request a copy of the 3CX CXD Server. To guarantee that the 3CX live events are appropriately captured and linked with TIM Plus, the support team will need to help with the CXD server installation.
We offer versions for Linux and Windows. The version needed will be determined by where the 3CX is installed. If you're installing on your 3CX server, you must install the Linux version; if you're installing on a TIM server, you must install the Windows version.
NOTE: 3CX CXD server is a 64-Bit application
Installing CXD
.
Once you have the installation package, before you begin installation, please check you have the following information to hand:-
- IP address of your 3CX PBX
- A username and password of a privileged account (e.g. root) that the installer can use to SSH in to your 3CX.
Once you have obtained your copy of the CXD
...
Connector installation package, run it and follow these steps:
- Choose an installation location:
- On the “Select Components” section
...
- , leave
...
- all options selected as default and
...
- click
.Buttonmacro Label Next
...
- On the “
...
- Ready to install” section
...
- , click on
.Buttonmacro Label Install - Once the installation is complete, the CXD configuration screen will
...
- be displayed:
Enter the IP address of
...
- your 3CX PBX
...
- in the first field. The username and password fields should be those of a privileged SSH user on your 3CX.
When you've entered the details, click
to attempt the connection to the 3CX.Buttonmacro Label Next - After a successful connection has been established, the next screen allows you to set the ports that CXD will provide, as well as an API Secret:
The API Secret is randomly generated, but you can choose your own.
When you've made a note of these details - they'll be needed when connecting TIM Enterprise to CXD - click
.Buttonmacro Label Next - When the wizard completes, it automatically starts the CXD Service:
Anchor configuring_tim_plus
Configuring TIM Plus
| configuring_tim_plus |
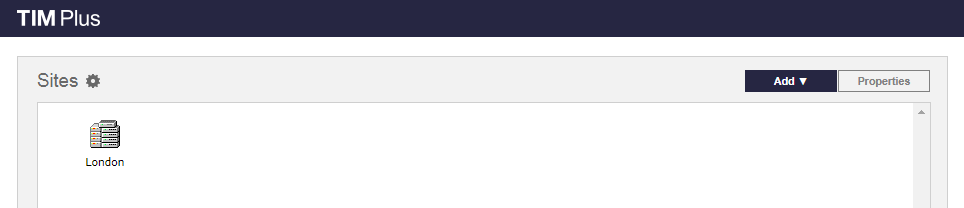
- To add a site, click on the 'Directory' tab.

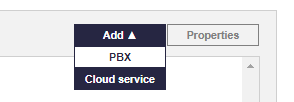
- Click on the 'Add' dropdown in the 'Sites' panel as shown below:
- Then select 'PBX' as shown below:
- A ‘Site properties’ panel will pop up. Select the 'PBX' tab and fill in as follows:
Name: Name of Site or Location where the PBX is located e.g. London.
PBX: Select ‘3CX CXD’ from the drop-down list.
Connection Method: Select ‘Actively connect to PBX’ from the drop-down list.
Host: The IP address of the machine where the CXD server was installed.
Password: This is the ‘API Secret’ created earlier.
Connection Script: Select '3CX CXD' from the drop-down list.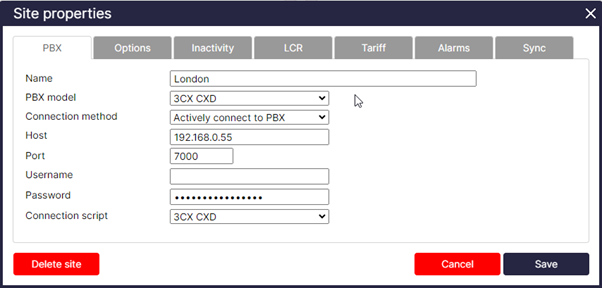
- An additional benefit of using CXD as the connection method is that TIM Plus can sync with the 3CX Server. A sync will allow you to pull a list of users and devices from the system. This allows you to configure and set up the directory much faster.
- On the “Site Properties” Panel click on the 'Sync' tab.
- Enter the following information:
Host: IP Address of the machine hosting the CXD server and the HTTP port set earlier when configuring the CXD server (Default 7000).
Password: Click Set, this is the ‘API Secret’ created earlier.
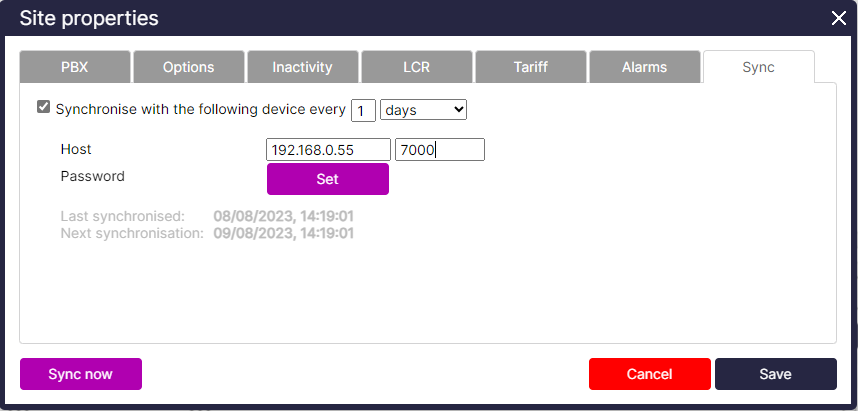
- Click 'Save' and the users will sync.
- Data should now appear within the 'Call view' Tab a test call can be made to confirm this.