Web panel
What is a web panel?
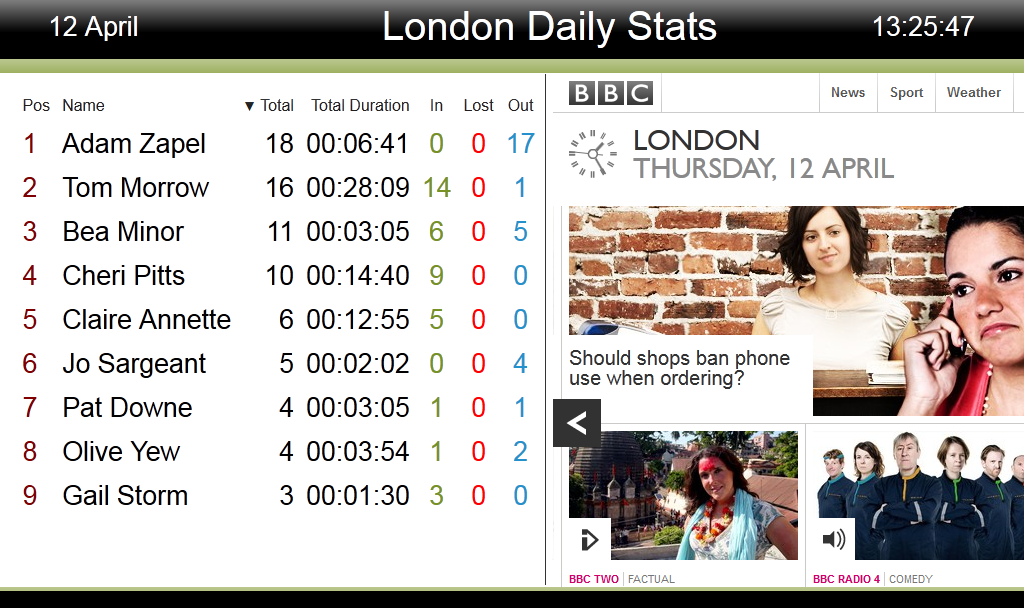
A web panel allows you to display a web page in any section of your display board. In the example below, the BBC News page is displayed at the right-half of the board, alongside a leaderboard panel.
Adding a web panel
To add a web panel, click on the  toolbar button to expand the list of panel types and choose the
  button, as shown below:

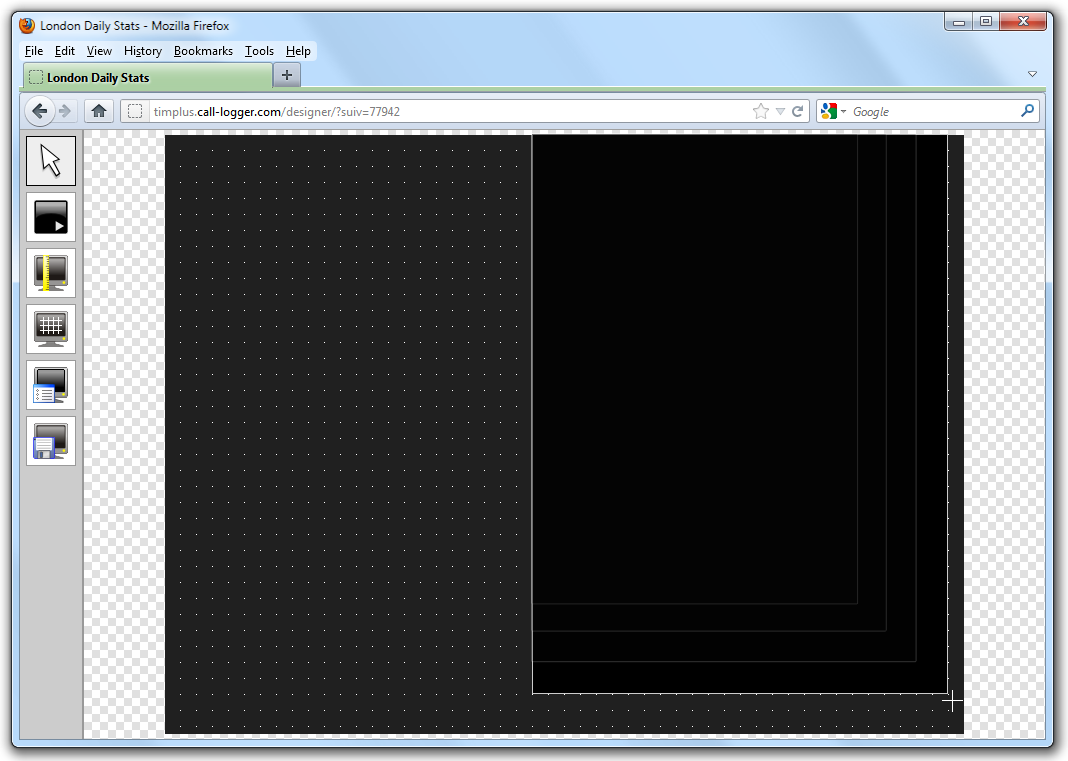
After selecting the web panel button, the mouse pointer changes into a white crosshair pointer, indicating that the designer is ready to draw your panel. Click and hold your left mouse button, starting at the point defining the upper-left corner of your new panel. Whilst still holding down the left mouse button, drag the marquee that will appear to the point that will define the lower-right corner of your panel, as shown below:
Customising a Web panel
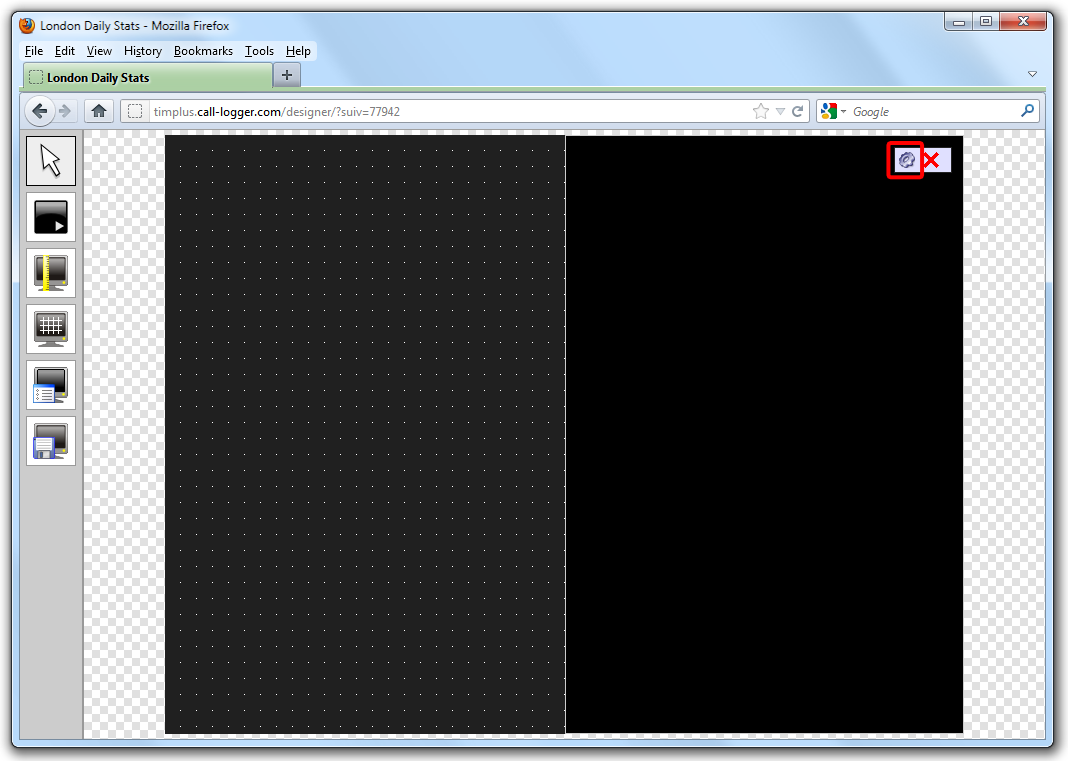
To customize a web panel, click on the  toolbar button to switch to panel selection mode. Hover your mouse pointer over the label panel you want to customise and click on the
  icon, when it appears towards the top-right corner of the panel, as shown below:
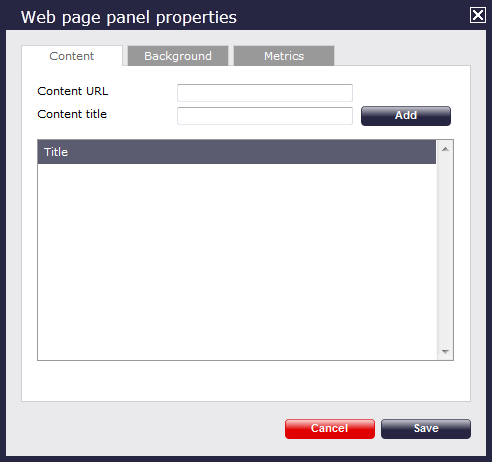
The Web page panel properties window will open, containing the following tabs:
Content
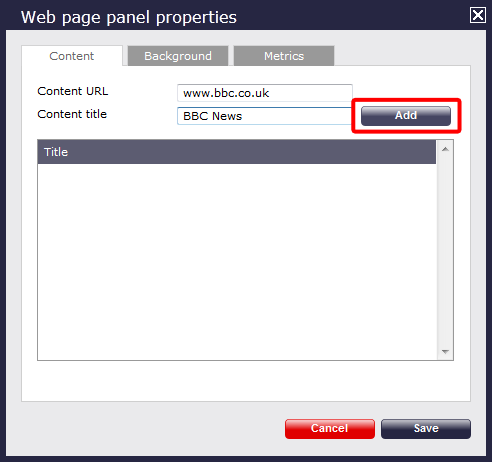
The tab allows you to add the URL and title of the web page you want to display. Click on the button to add the web page to the panel, as shown below:
Background
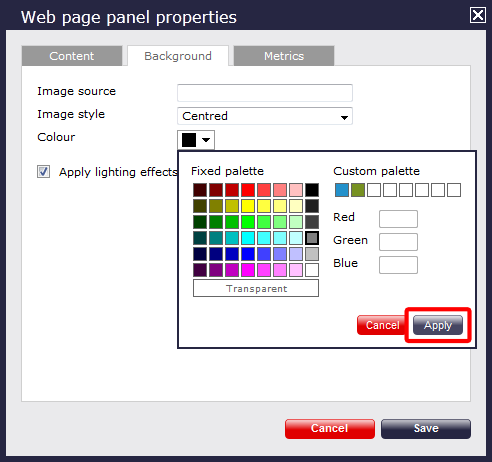
The tab allows you to configure the background properties of your web panel.
| Field | Description |
|---|---|
| Image source | If you want your panel to display an image, type its source here. Remember, the path is relative to the folder on disk from which the web content is served, and is different for each class of web user |
| Image style | Choose how the image should be displayed |
| Colour | Choose the background colour of the panel; if you are adding an image, you may want to select Transparent so that this does not interfere with your image |
| Apply lighting effects to this panel | Tick this option to apply a shine effect to the entire panel; if you are using the panel to display an image, this may adversely affect how it appears |
Metrics
The tab allows you to define the shape of the panel, by entering values for its position and size. You are also given the option to determine the refresh frequency of the page, by entering a value in the Page display time box.
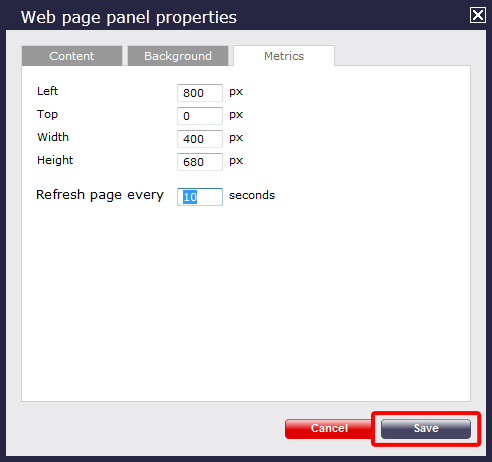
When you have finished configuring the properties of your RSS panel, click on the button to apply the changes.
Web panel - overview video
For a live demonstration of how to design and customise a web panel, watch the video below:
What is a Web panel?A web panel is, as the name suggests, simply a panel which displays a web page. In the display board below, you can see BBC News page on the right half of the board. 
|
How do I add a Web panel?
To add a web panel, click on the  button and then select the
  button, as shown below:

The list of panels types available immediately disappears and a blank screen will appear with the white cross-like pointer sign indicating where the panel will begin on the screen.

How do I customise my Web panel?
To customise your web panel, click on the  button on the top left hand side of the screen.
Then click on the
  icon of the panel that you want to customise, as shown below:

The following screen will appear:

Content
Type the URL and title of the web page you would like to appear or Ctrl V to paste. Then press .
This will appear as follows:

Background
By default the background of the Web panel is black with a lighting effect. However you can add an image source as the background and either choose to have that image centered in the panel or repeated by typing in details. In that case, you may even want to set a transparent background for your image. Alternatively, just pick a colour from the colour palette and leave the Image source field blank, as shown below:

Metrics
The width and height of the panel containing the Web page will be picked up automatically. You can change this by using your mouse to drag back to a different size or by changing the number of pixels in to define the panel size.
You can also choose the refresh rate for the panel by entering the required article refresh rate for the panel as shown below. At the end, click the button to save any changes made.

