Configuring a web user
Overview
A web user is a user that has been provided with a username and password to allow then to interrogate TIM Enterprise remotely.
To configure a web user, locate the object in the Directory, click on it and select Properties from the drop-down list, as shown below:

A new window will open, allowing you to configure the properties of your web user.
General properties
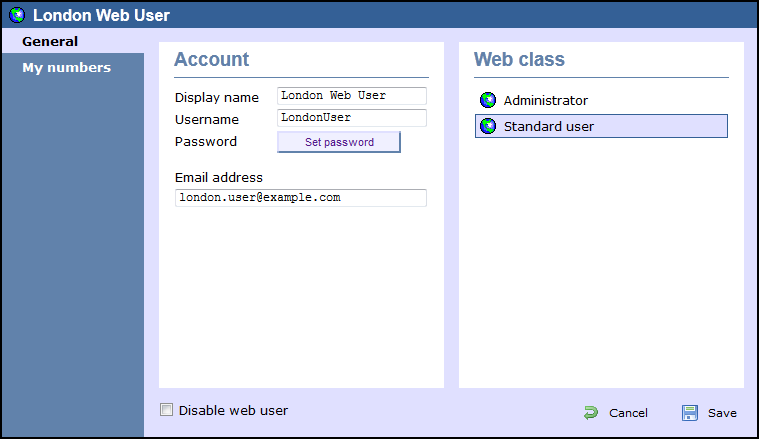
| Field | Description |
|---|---|
| Display name | The name you want the web user to be identified in the reports |
| Username | The username the web user will use to log in with |
| Password | The password the web user will use to log in with |
| Email address | The email address of the web user; this can also be used when scheduling reports |
| Web class | Select the administrative privileges of the web user |
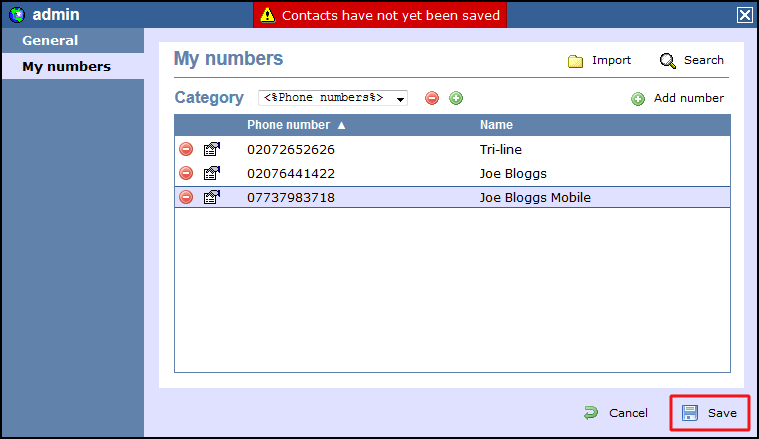
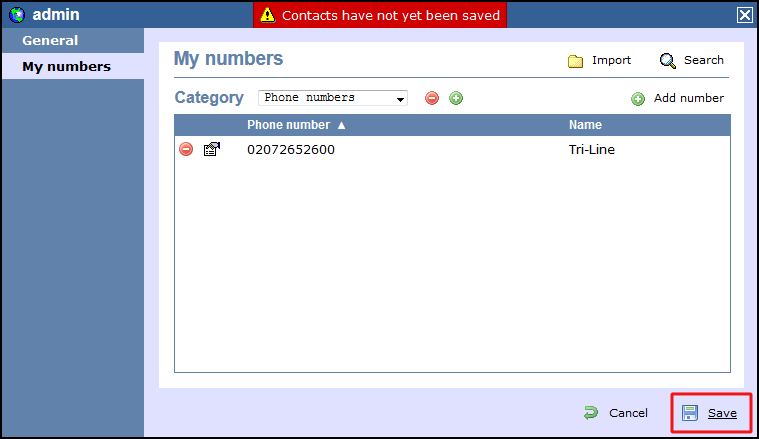
My numbers
The My numbers tab allows you to manually add or import a list of contacts to the current web user, replacing phone numbers or account codes with friendly names wherever they feature throughout the system, e.g. in reports, display boards, etc.
Adding contacts manually
To manually add a contact to the currently-selected web user, choose the type of contact you want to add from the Category drop-down list and click on the  icon, as shown below:
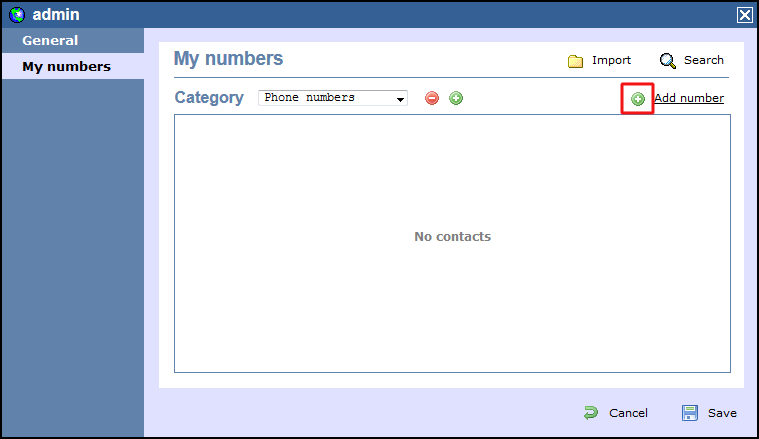
A new window will open, allowing you to enter the telephone number and the name you want to associate with it.
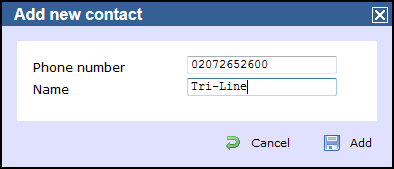
To add another number, follow the same procedure, then click on the button to apply the changes.
Importing contacts
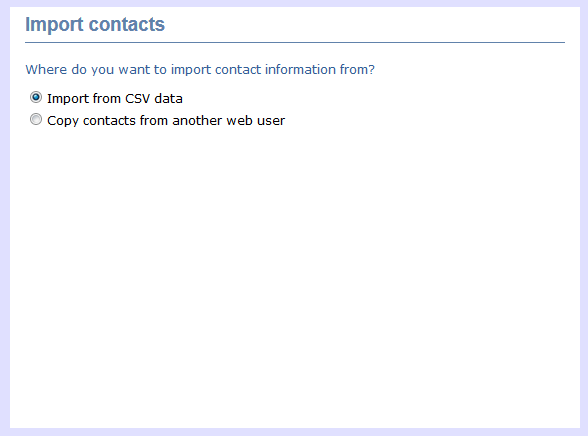
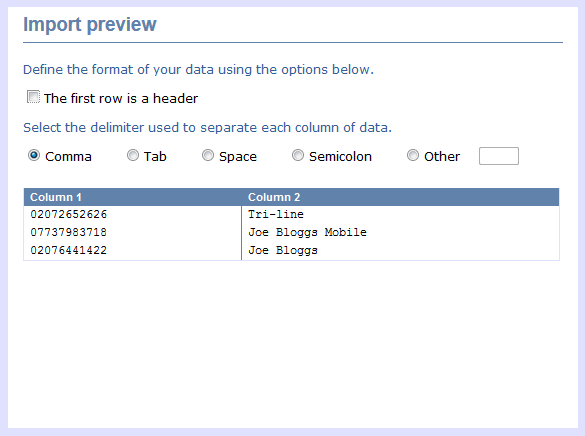
TIM Enterprise allows you to automatically import contacts in the system from an existing CSV list. The columns in the list should be separated using a common delimiter, such as comma, dash, semicolon, tab or space.
To import a list of contacts, click on the button. A new window will open, allowing you to configure the contact list for the selected web user. Each step of the process is presented in the table below:
| Option | Description |
|---|---|
Import contacts | This section allows to choose the source you want to import the contacts from, e.g. a CSV list, another web user account;
|
Contact type | This section allows you to select the type of contact you want to import, e.g. account code, phone number.
|
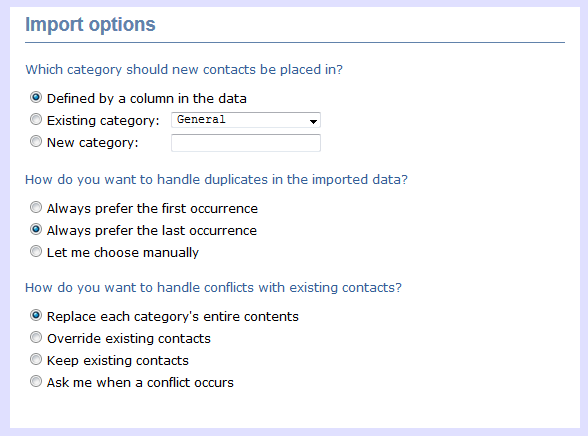
Import options | This section allows you to select in which category you want the contacts to be included and how to handle duplicated entries or other conflicts with the existing contacts.
|
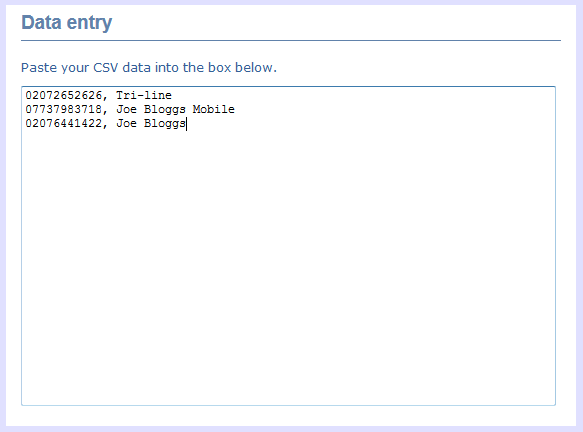
Data entry | This section allows you to paste the CSV list in the box provided.
|
Import preview | This section gives you a preview of the imported contacts and allows you to select the delimiter you want to use to separate the two columns.
|
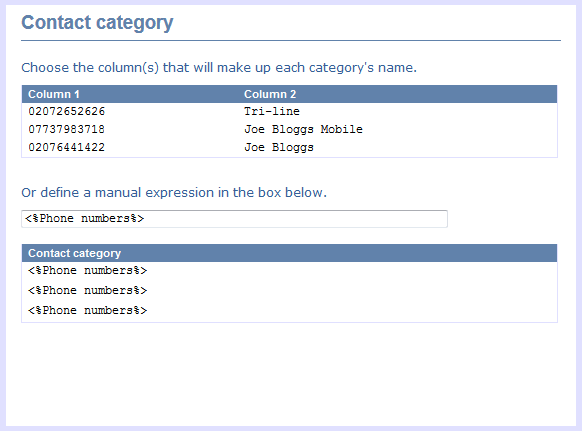
Contact category | This section allows you to select or define the column(s) that will make up each category.
|
Contact phone number | This section allows you to select or define the column(s) that will make up each phone number.
|
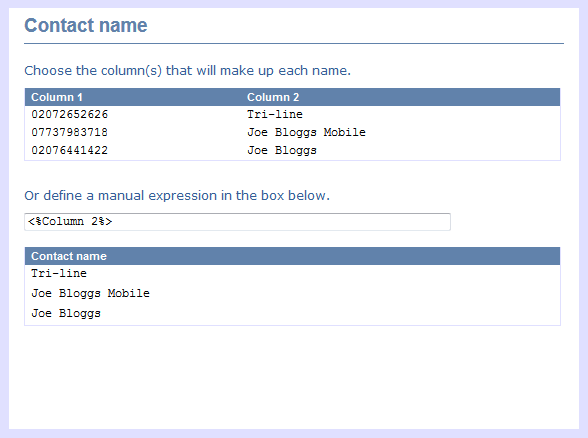
Contact name | This section allows you to select or define the column(s) that will make up each name.
|
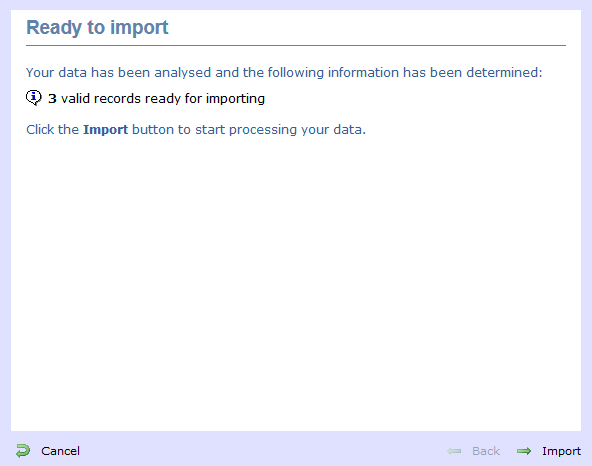
Ready to import | This section notifies you how many records are valid and ready to be imported.
|


The contacts will be added to the list, as shown in the screenshot below. Click on the button to apply the changes.